Friday, 5 July 2019

Crabbendam 1799

Well I'm still not getting much gaming done but I did get into the loft for a quick play-test of some rules I've been tinkering with. For this game I decided to use the 25/28/30mm collection of French Revolutionary Wars figures that I have amassed. I may have said before but this really is not my preferred scale - I know it is in widespread use but ...
Anyway- the scenario chosen was the Battle of Crabbendam, the second battle in the Helder campaign of 1799. To set the scene a little; the British have successfully landed the first wave of their invasion force, taken the town of Helder and captured the bulk of the Dutch fleet. Many have speculated that if the British commander, Abercromby, had struck at Amsterdam it would have fallen easily and perhaps have precipitated the counter revolution his government had been hoping for. As it was he chose to err on the side of caution and dug in along a line of dykes and canals to await reinforcements.
As he waited the Dutch Republicans, the Batavians, received reinforcements from their puppet masters in France in the form of General Marie Brune and a Brigade of French troops. Hoping to drive the British from their foothold (and show the Dutch a thing or two no doubt) Brune decided to attack at once.
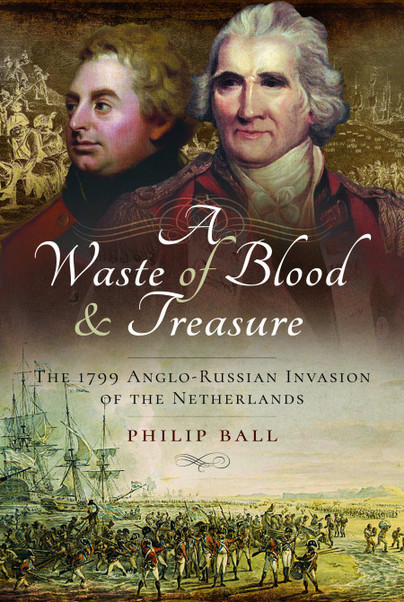
What followed was a bloodily repulsed attack on at least partly prepared (and largely impregnable) positions along the dykes. Without proper preparations the attack stood no chance but there was heavy fighting in some of the villages that defended the bridges into the British position. The whole battle wouldn't make much of a game so I concentrated on a small affair concentrated on the village of Crabbendam itself which was defended by the 20th foot. The small numbers lent themselves to my rules and the larger figures. Those wishing to know more about this fascinating campaign should immediately rush out and secure a copy of 'A Waste of Blood and Treasure' which details this battle and the others in the campaign.


The general position - the French and the hotch-potch of Prussians and Hessians pretending to be Batavians are on the right...

The 20th Foot stand ready - they were composed largely of new recruits fresh from the militia but performed admirably.
The Franco-Batavians advance.

The British reinforce the position- guardsmen rush across the canal
The Batavians launch the first attack.
Prompting further reinforcements- These are old 25mm Hinchliffe highlanders from my father's collection (owing to a lack of suitable British figures)
The position is outflanked.
... And the French burst through the gates after overwhelming the defenders with a successful melee round.
Meanwhile, the brave 20th sally out to prevent the position being completely enveloped.

But... they are facing fearsome odds and numbers soon begin to tell.

Things aren't all gloomy for the British as the Guards halt the French advance into the village. .


Out on the left wing the British deploy into line to give the approaching light infantry a taste of their superior musketry.
Here too they are outnumbered and in danger of being outflanked- A lively fire-fight ensues.


Back in Krabbendam, the Franco Batavian troops are pouring in through every gate and side alley and a confusing melee breaks out.


Having wiped out the 20th, Vandamme's 'braves' attempt to get around the right of the position but are engaged by British (well, Hanoverian actually) artillery.
Battle royal rages in Krabbendem as the Gordons rush over the bridge but the British are forced back to the outskirts. A further push-back the following turn gives the Franco-Batavians possession.
This was a nice little game with a very different feel from my usual battles. It was a lower level than normal and I felt captured the see-saw nature of this battle quite nicely. wasn't entirely happy with the rules but feel that with a few tweaks they will serve.


Saturday, 27 April 2019

THINK BIG

It's been a while and I have had trouble logging in so let's see how this goes!
Just to recap - last time a ten year old was destroying my panzers on the outskirts of Prokhorovka. Things did improve slightly (follow a re-read of the rules) but it wasn't enough to change th eoutcome and it counts as a glorious victory for the Red Army - ZA RODINU ! - There are sadly no more pictures as the camera batteries were flat...

On to the next thing - A BIG game!
In honour of a friends birthday we are hoping to re-fight Waterloo in 54mm so have been painting stuff and dusting off old half finished units to see what I've got...


Not too shabby - more than I thought - most are going to need re-basing as they just fall over or are bit tatty.


Newly painted Dutch - A Call to Arms figures (flag from Warflags.com )


Opposition - Old Airfix figures - I started with these (in some case these actual figures) - the old paint has been removed a new coat slapped on.


French heavy cavalry.


Boney and his Guard - small unit; currently being expanded, Airfix & Italeri. The Guns are Irregular Miniatures.


He looks happy - probably still thinks he's going to win!


Guard from the rear.


Voltiguers; prone to falling over - Irregular and a couple of Britains'


French column advances, preceded by HaT Light Infantry.


Supported by light cavalry.


The thin red line awaits...


Just look at the height difference here - Airfix on left, 'Supreme' on right.


Wednesday, 2 January 2019

Citadel - The Curse of Kursk

Still no 'proper' games to report on but in the interests of corrupting the young I have been engaged in some WW2 action. To cut a long story short an interest was expressed in playing a game with "Lots of tanks" which led me to Prokhorovka. Allegedly the greatest tank battle of all time this is not an easy battle to recreate but I like to think I have given my young opponent a flavour of the action. The rules used were Rapid Fire.


Well it's the Kursk campaign so there had to be Tiger tanks...


In Prokhorovka itself the Red Army prepares to spring its trap... Many, many T34s.

Supported by infantry and artillery- figures and tanks are from a host of manufacturers (1:72 scale)

Zvezda howitzers!

Italeri Zis3s lie in wait for Panzer Grenadiers

Casualties quickly mount

The armoured spear point advances to their rescue.

Apparently the Soviet commander is unconcerned about surrendering initiative to the enemy. He waits; aiming to destroy them with his pakfront...

... and he succeeds...

In fact, because he is better at rolling dice than teh dastardly old Hun he soon has most of the German army burning on the steppe!

Some Soviet infantry edge forwards to flank beleaguered panzer grenadiers as they crawl from their burning halftracks.

The Germans try to fight back but I think we can all see where this going !
More next time!


Sunday, 23 September 2018

Old School Outing

Good Afternoon!
Sorry that I have been neglecting you but I just haven't had any big games this year. Just to let you know- I have still been having my regular evening games with friends so I will post some pictures from them. I currently don't even have another game planned as I am busy writing and 'being academic'!
Anyway just for a change of pace we have been doing a bit of what I shall call, for want of a better term, Old School Gaming. That is to say we used simply painted 30mm figures with a version of the 1960's ruleset 'Charge or How to Play Wargames'. I always enjoyed the Charge rules having been introduced to the m by Dad when I was a nipper; he believing there should be some regulation to my games of soldiers thus starting me down the slippery slope! However, when using the rules recently I found them to be a bit bloody and I felt that for French Revolutionary battles they needed to cover morale so I wrote my own version. As it turned out I hadn't really thought them through very well (this happens a lot with my own rules) and the game was a bit hit and miss but here are some pictures:


In homage to the source material we played a version of Blasthoff Bridge - this is towards the end and the allied commander has deployed his guns in a rather nasty grand battery - teh resuot was messy!


Electoral (actually British) Guards advance over the bridge.


The same... but closer! '28mm' Figures from Irregular Miniatures - Bridge by Italeri. These figures were painted extremely quickly (in batches of 50!) for a re-fight of Hondeschoote at a friend's house and look quite reasonable - might gloss varnish them to enhance the nostalgic vibe!

The opposition - Foot Gendarmes of Paris- 30mm this time (almost no difference in size) also from Irregular.


The cavalry lie in wait for any Hanoverians foolish enough to attempt th eford!


Chasseurs by Spencer Smith - too small a unit to be effective they covered the flanks and were later decimated by the grand battery.


That battery! Guns by Irregular and Hinchliffe plus some Foundry gunners.


So - the game wasn't great and I do prefer the feel of a big battle for which you can't really beat 20mm (1:72 call it what you will) but I did quite like the idea of this kind of game and will persevere with these rules... though I might try 'Black Powder' .

Saturday, 14 April 2018

1/32 Cuirassiers

This is for the fellow on the HaT forum that reckons no one makes decent French Cuirassiers in 1/32 - They aren't perfect but they look pretty good to me.

Wednesday, 4 April 2018

27th August 1799 - Battle of Callantsoog

Image result for callantsoog 1799

Well there weren't many assault landings in the eighteen century but this was one of the few. You can read all about the real thing in my book (it's even on the cover):

A Waste of Blood and Treasure

Plug over on with the game!
The battle was the first stage in a British attempt to invade the Netherlands (or the Batavian Republic as it was calling itself) and free it from the French yoke.
This one involved quite a bit of painting and modelling as I had to paint two armies and build an invasion fleet and a beach... was reasonably pleased with the results.

Turn 1- The British Land

It's that pirate ship from Wilko's with a new coat of paint, showing her worst side.

The navy gets the lobsters ashore. Here the Guards Grenadier Battalion (Irregular AWI) are helped from Zvezda launches by HaT sailors. Historically the landings were a shambles but I wanted to make a game of it so landed units in waves and had lots of skirmish bases.

An overview of the battlefield showing Daendels' Batavian army poised to implement his plan to repel the invaders but will they fight or will they embrace the counter-revolution?

Turn 2

The British land more troops.

 The Batavian Jaegers begin to skirmish with the British light companies.
But mostly they hold their position (cavalry from the  Irregular Miniatures 'Early Napoleonic' range)

 ... and observe the landing out of range of the ships' guns.

Turn 3
The British land more troops- In fact Moore's troops!

Moore's Brigade on the beach.
The light companies push back the Jaegers.


Turn 4

There is more desultorary skirmishing


The Batavian line is strengthened by the deployment of some infantry companies but they are pushed back.

Turn 5

The British take the first line of dunes.

The Guards push on through the centre.

Turn 6
There is a lot of skirmishing but increadibly every single hit was saved and there was no result apart from the inexorable adavance of the British invasion force.
 The British push up to the sand dyke.

Colonel Crass leads the defence.
Turn 7

The British take the Sand Dyke and the Batavians finally move.

Fighting atop the dyke.
The Batavians advance to meet the invader.

Turn 8

The British break through to the planes

Some artillery is dragged up the beach.
Moore's Brigade also moves off the beach.

Turn 8
The British close with the bayonet but things don't go their way and they are thrown back.

The melee.
The Batavians withdraw to unmask their guns and counter attack but with little success.
7HB move up from Helder to encircle the British.

Turn 9
The Guards assault the telegraph post.

But are repulsed - The telegraph is made from a drinking straw, a couple of coacktail sticks and some wine bottle foil. - It is protected by an emplaced artillery battery.


The Batavians fight back and there are melees along the whole line.
Turn 10

The Guards rally under fire by the telegraph post - It turns out I interpreted the rules incorrectly and they should have taken the post last turn but hey - that's war!
 Moore's Brigade continue to advance.


The Batavians throw in their cavalry and successfully attack the Guard Grenadiers.
Turn 11
The struggle continues with no conclusive result.

It's the sun!! As rare in my loft these days as in the Helder in 1799!
Turn 12

The British finally take the telegraph post.

This was a tough nut to crack historically too.

Triumphant guardsmen.
The Batavians are beaten back across the whole front. Their only fresh troops are those from Helder who hav ebeen held up by pockets of British infantry in the dunes. Although they have suffered heavy casualties, the British are in a comanding position and may call this a successful landing. 
Nice little game really.